
# Post Scheduling
You can access the settings here Social Media Settings (opens new window)
# Schedule Posts
Follow these step-by-step instructions to efficiently schedule your post:
# Step 1: Select Date and Time
- Navigate to the Calendar tab within the app.
- Click on the date and/or time for when you wish to schedule your post. You will be redirected to a setup page that looks like this:
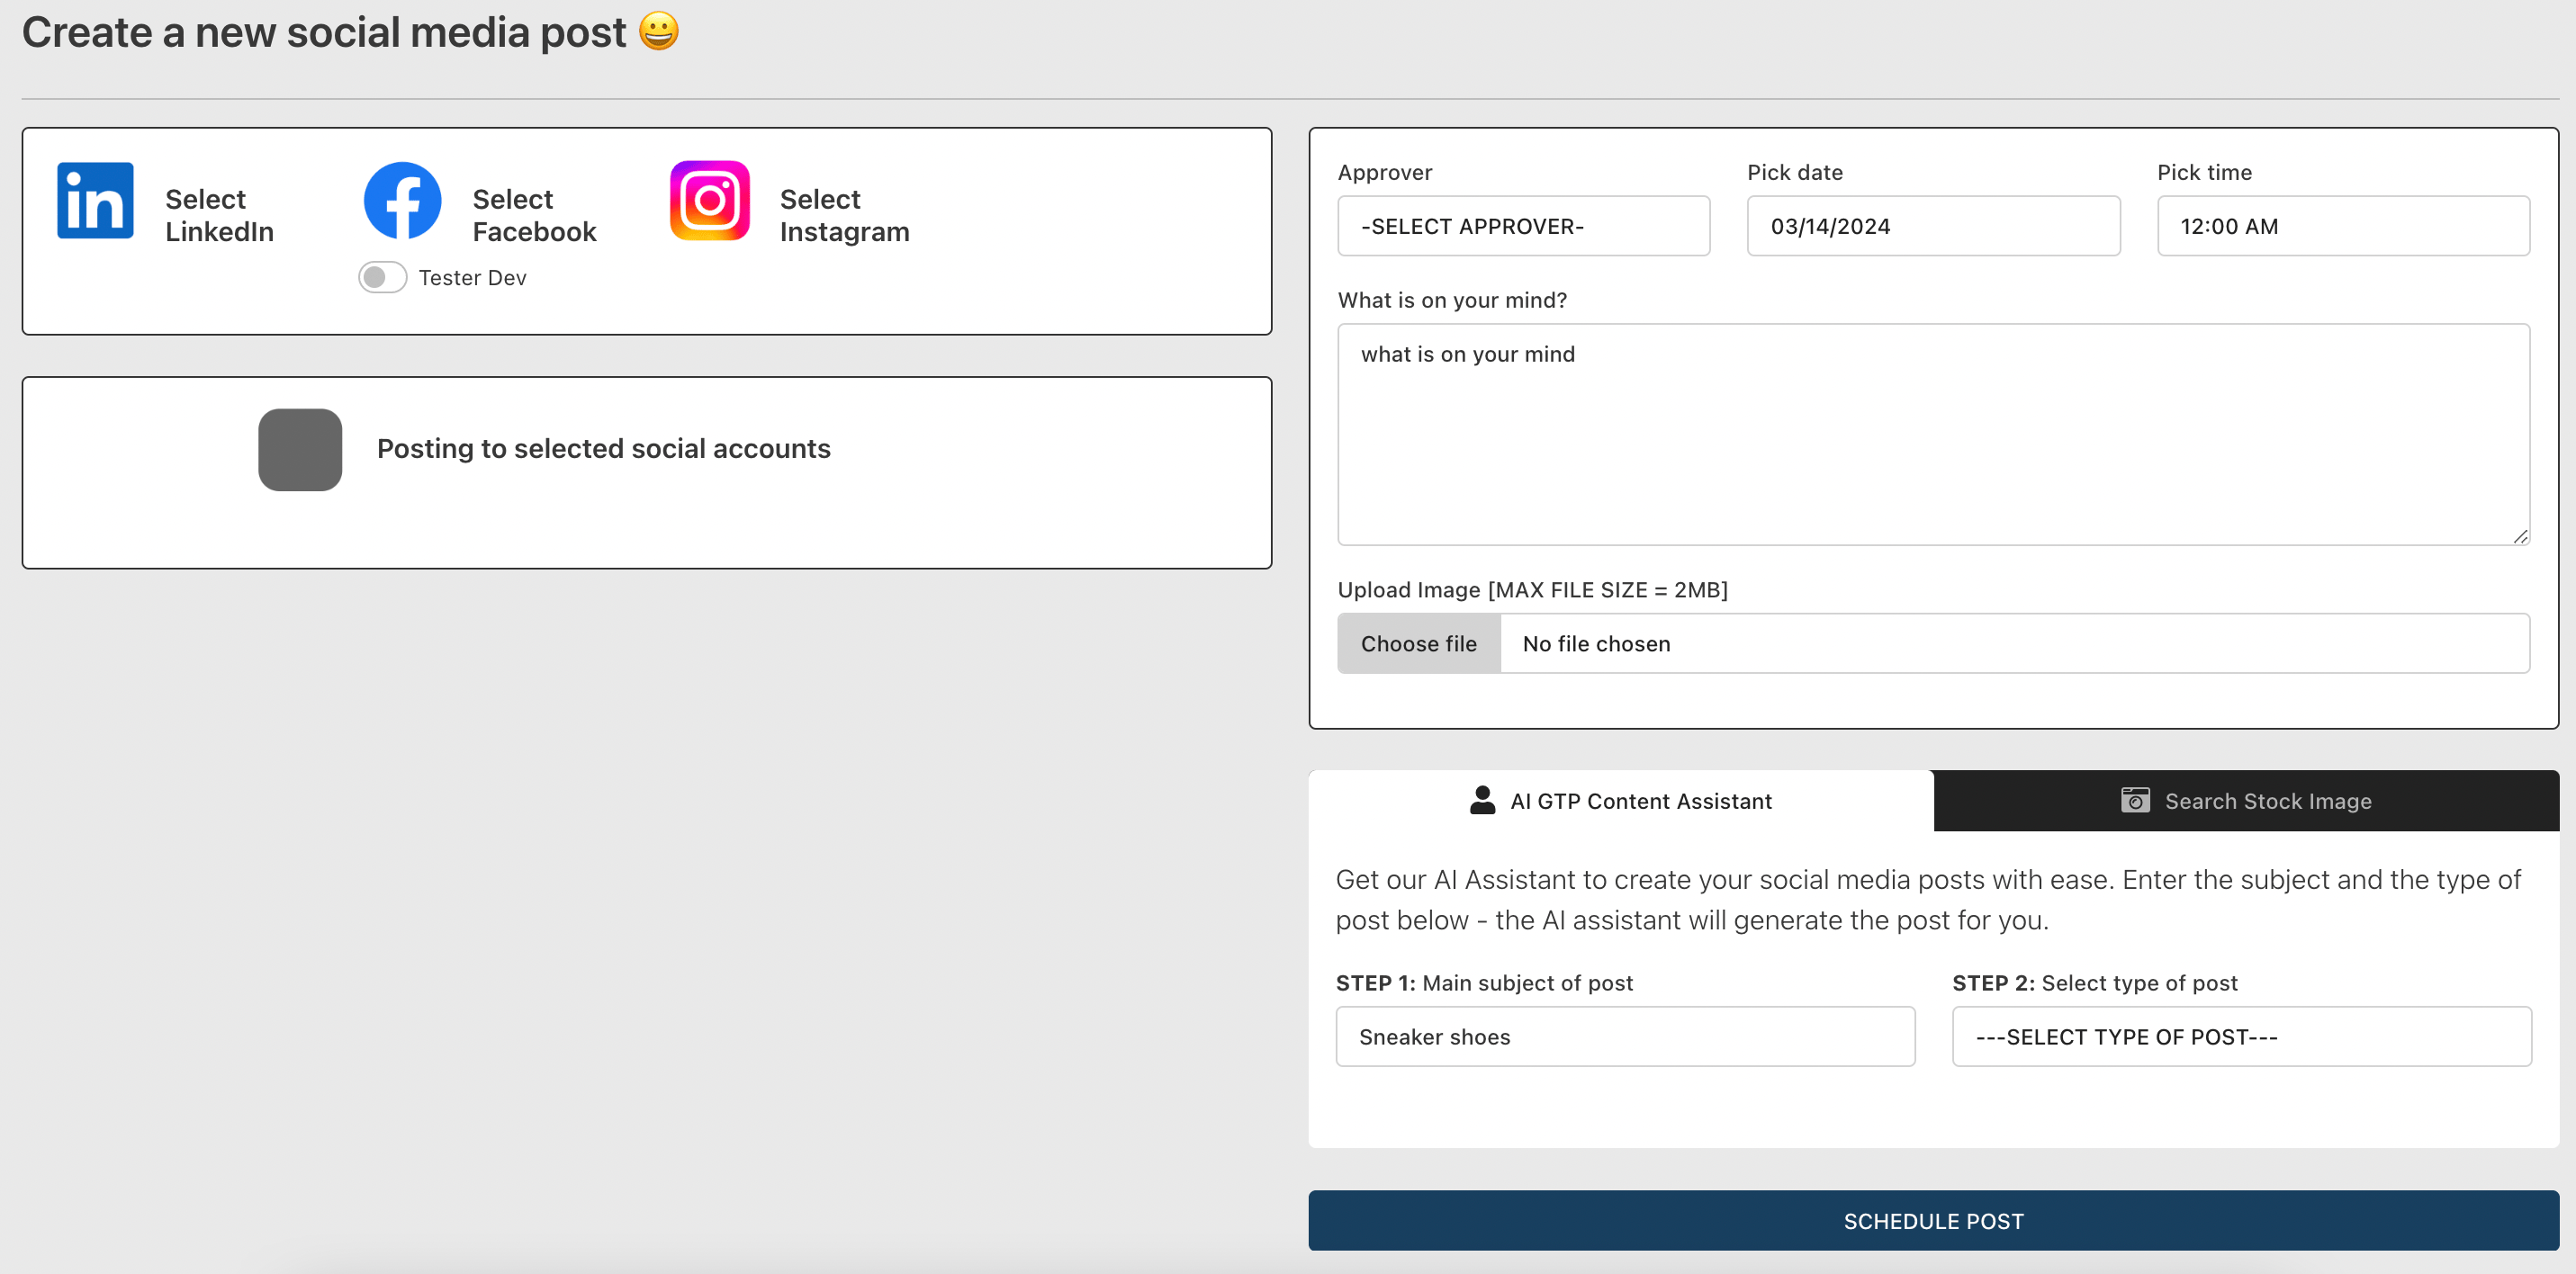
# Step 2: Choose Accounts and Approver
- Start by selecting the accounts you want to post to. These should be accounts you've previously linked in the Settings tab.
- Choose an approver for your posts. This is a designated individual who will review and approve your content before it goes live.
- Double-check the date and time of your post. Make any necessary adjustments to ensure accuracy.
# Step 3: Create Your Post Content
Option 1: Manually write your content in the "What's on your mind?" textbox.
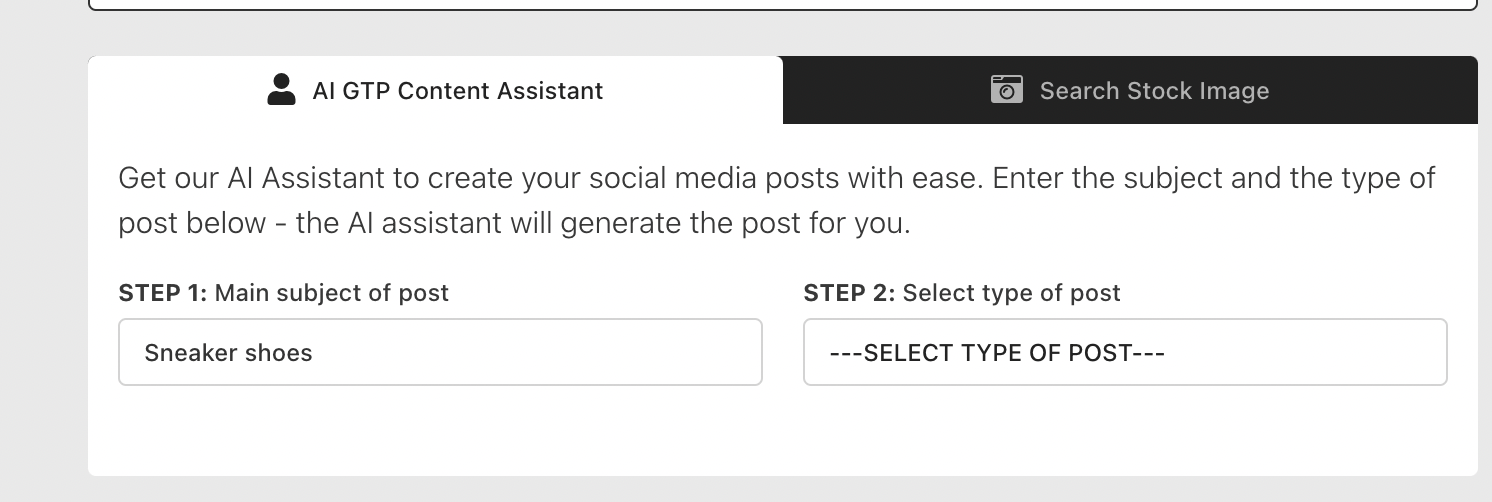
Option 2: Use AI assistance. Type the main subject of your post and select the post type from a dropdown menu. The AI will generate content based on your input, which you can edit to your liking. To use the AI for your post, simply type in what you want to talk about in the main subject area. Then, choose the type of post you're making from a dropdown menu. In a few seconds, the AI will show you a draft of your post in the "What's on your mind?" box. Feel free to make any changes to it as you wish.
# Step 4: Add an Image
You have two options for adding images to your post:
- Upload from Device: Choose an image directly from your device and upload it.
- Search for Stock Images:
- Click on "Search for stock image" to access free stock images provided by Pixabay.
- Input your search parameters (e.g., "group of black entrepreneurs") and select the type of image (photo, illustration, vector, etc.).
- Choose one of the displayed images to accompany your post.

# Step 5: Review and Schedule Post
After adding an image, review the preview of your post. If satisfied, proceed to schedule the post by clicking on "Schedule Post".
Once you've created your post, it will appear on the calendar and within the "Awaiting Approval" tab. If you need to make any edits, you can easily do so by either clicking on the post directly from the calendar or selecting the "Edit" option found on the action button within the "Awaiting Approval" section.
# Approval Process
The designated approver can log in to their Digital Practice account, navigate to the Social Media App, and select the linked pages. In the Awaiting Approval tab, they can review the posts, choosing to approve or reject them.
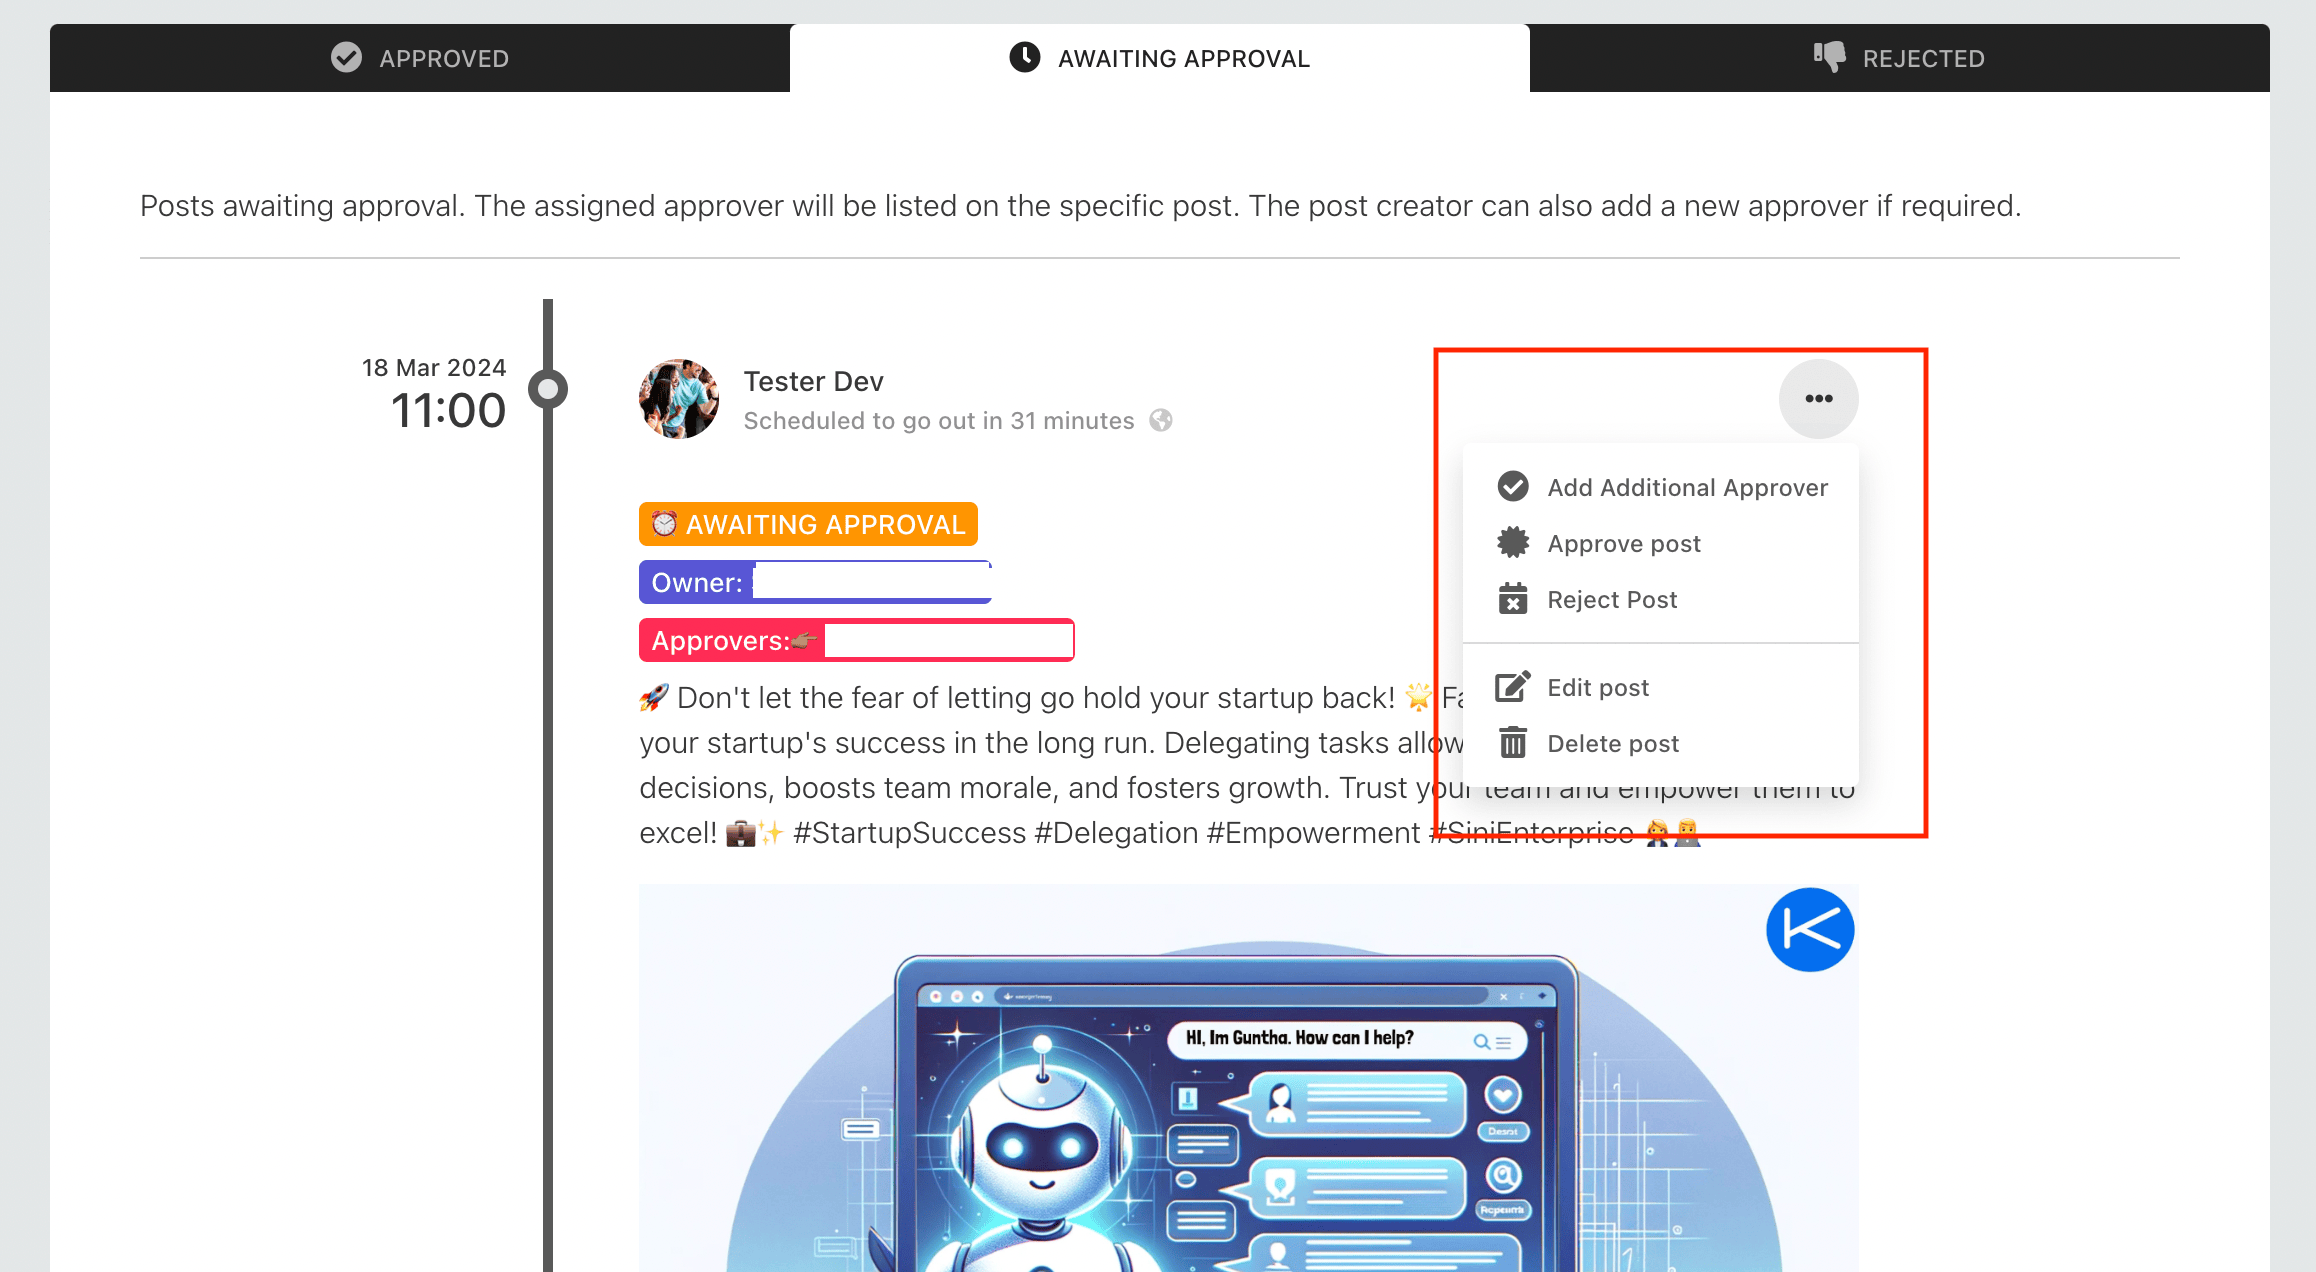
Once approved, the post will be listed in the Approved Posts tab and will be published at the scheduled time.